Last April we were able to remodel our main bathroom. Our house has 1 1/2 baths so this is the bathroom that everyone uses to take showers, brush their teeth, do their hair (only me!) So, when we had to go without this bathroom for a month, it was rather, uhhh, inconvenient!
But it was worth it! I love the bathroom now. I am not great with the actual finishing decorating touches. Maybe you guys can give me some suggestions for things to put on the counter and walls!
The worst part of this “reveal” is that I don’t have any before pictures. I guess I didn’t want to remember how it looked!!
The bathroom is quite narrow and long and when the house was built and moved on the farm – 35 years ago (before my time!) the design featured a closet for the washer and dryer in this bathroom. The owners at that time had built the western part of the house (the kitchen, utility room, back hall and back 1/2 bath) and just added the prebuilt and moved portion to it. Since they already had a utility room with a washer and dryer they didn’t need the closet.
Since the closet wasn’t being used for laundry they added some shelving. Not a bad set up but since the closet was in the corner and came up to the door, the light switch was in the hallway instead of in the bathroom.
If anyone has kids – they KNOW what a temptation it is to turn the light off while Mom is in the shower! And of course, there wasn’t a lot I could do about it at the time if Dad wasn’t home!
The closet did not have a light in it and was deep enough that things tended to get lost in the back. We lived with it for 6 years.
Then we started having problems with the tub leaking. Sooooo, if we needed to get a new shower – why not do the whole bathroom – Yeah!
We actually bumped out the wall that the shower is in by about 10 inches so that we could fit a standard tub shower in. They had a very narrow shower before. We tore out the old vanity and huge medicine cabinet. We were able to sell both of those on Craigslist for $100. Better than the landfill!
We tore out the closet and all the shelving in it and even moved the toilet away from the wall in the corner to a standard distance. Before it was a little bit of a squeeze! No elbow room.
So – on with the pictures – sorry to make you wait so long!
This is the view when you first look into the bathroom. The window with the light makes the pictures a little dicey – sorry!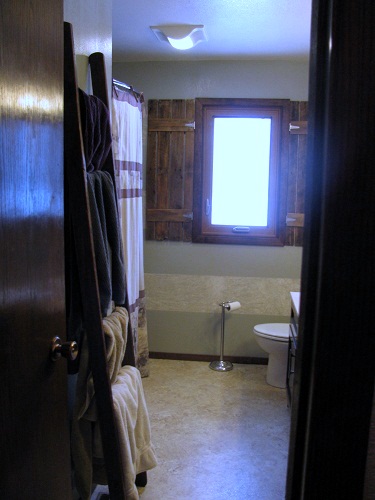
We replaced the closet/vanity with a new vanity that steps up and a tall linen closet.

We put 2 light bars – one above the sink and one above the higher counter. I use this counter for doing my hair and makeup.
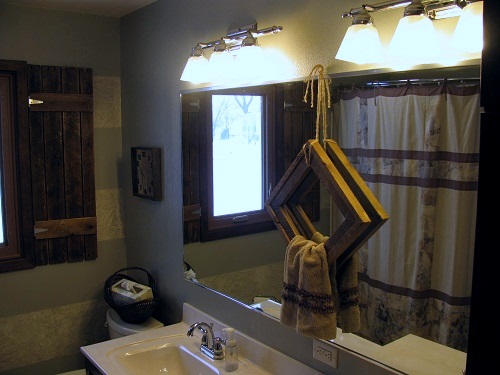
I bought a hand towel holder to set on the counter but it didn’t work out real well, so for now, we are using a barnwood frame hung from above the mirror to hold our hand towel. I made it using palette boards and Ana White’s instructions.

I love the furniture feel with the feet and the overlay door and simple handles. I do need to find a rug, but I haven’t come across anything I love yet!

Here you can see that the light switch is now IN the bathroom – no more dark showers!!! I also love the crown molding on the linen cupboard. Not sure why I’m calling it that. The towel aren’t even stored in there!?!

Here are some of my favorite things about this built in – laundry hamper. The bags are fabric mesh and can easily be pulled out and taken to the laundry room – without sorting!!! Well, mostly. Sometimes, little boys seem to have a problem telling whites apart from blue jeans and shirts!

This drawer is “Mom’s” drawer. It holds my electronic hair equipment a.k.a. blower dryer, curler and curling irons! But the best part is….

There is a power strip in the back of the drawer – so I can just flip the switch, put my stuff on the counter right next to it and when I’m finished, turn it off and throw everything back in the drawer. No clutter is left on the counter. I put a large metal pan in the drawer so that is the curling irons are warm yet, they don’t burn anything else. I am so glad we designed this cabinet!!!! It helps that my BIL is a carpenter, so he went with my odd suggestions! I have to work on a better system for the cords – every once in awhile I have to untangle. Any ideas?
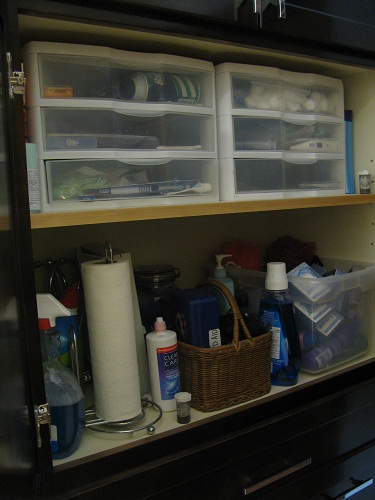
The doors above the “electronic” drawer house all of our cleaners, soaps, bandaids, and I added a couple drawers for some of the smaller items on the top shelves. It works out really nice.
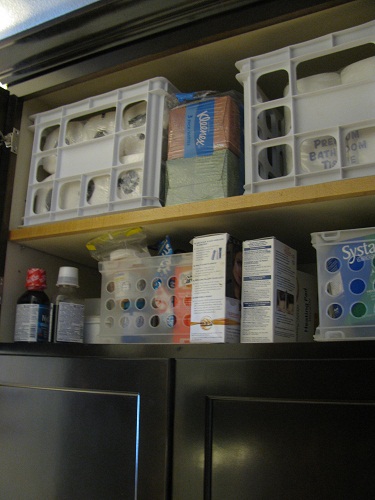
The very top 2 shelves hold things like toilet paper, medicine, and Kleenexes. I put them in crates to make it easier for me to get to them. I am only 5’5″ so I’m a little vertically challenged.
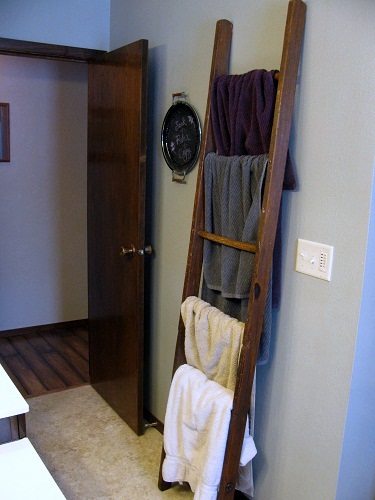
I needed a vertical system for all of our towels so I went with an old ladder I got from my mom. I cut it off, sanded it down somewhat and put about 10 coats of a rub on poly. I really like the rustic look along with the modern sleek lines of the cabinetry.

Then I also made these shutters out of the pallette boards and my husband helped me hang them. He was a little skeptical, but he really likes the look and they work! I didn’t have anything on the windows for a couple months. And even though we live in the country – I wasn’t comfortable stepping out the shower with a bare window! I like how they turned out and no more flashing anyone out the window.
 I made the shower curtain out of leftover material that I had and then bought some hand towels and added matching trim. Wish I could same the same for the large towels hanging on the ladder. Sometimes we have Lion King and Nemo!

One more shot of the shutters closed. The basket on the toilet was a thrift store find that I painted a dark brown. It holds the tissues and a couple extra rolls of toilet paper.
I was really nervous about doing this remodel because I knew that it would probably not be changed as long as I live here – which will be until we retire – if then! So I didn’t want to make any mistakes. And it isn’t perfect, but I am really happy with it so that is what counts!
I’m linking to the following parties…


