Well – after 2 years of saying I want to redo the closet – it’s done! At least, mostly done. I have decided that nothing is really ever done done.
Just a note – I do not move our seasonal clothes out of the closet. We have pared our clothes down so that every hanging thing we own can fit in our closet.
I’m linking to the following…
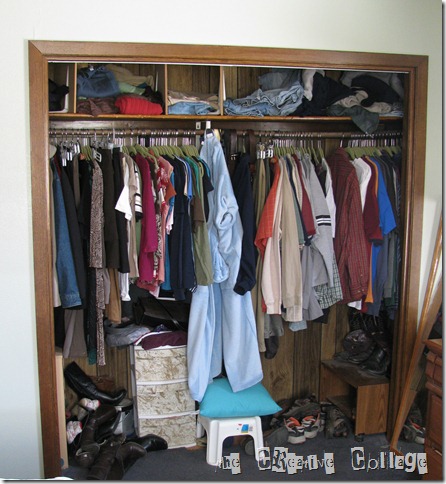
As you can see, I have a few organizational items in place. I covered the front of the plastic 3-drawer organizer so I could store my unmentionables in there. I made some makeshift shelf dividers for the top shelf. There were actually 6 dividers total, but I took some out because I knew I was going to update, so it is a little messier than usual. It was always hard for me (at 5’5”) to keep the piles on the top shelf neat – thus the step stool!
Here – you can see that they had a short drawer/shelf deal that fit underneath the shelf/bracket and the carpet was installed around it – thus the missing square of carpet…
So – I took out the shelf and tore out the cleats holding it and this is what was left.
But – let’s not dwell on how it was…
Looking so much better after primer and 2 coats of an Oops white(ish) paint.
I pulled back the carpet and put down some sticky vinyl tile. I don’t plan on having the lovely blue carpet forever, so this way – we can switch out the flooring in the bedroom without messing with the closet!
And finally! – the towers that I made (mostly by myself!) added. I used Ana White’s closet tower plan but mine are only 16″ wide instead of 27″. My husband helped haul them up from the basement where I built and painted them. They are quite heavy duty!
He also helped me secure them to the wall and add all the hanging rods – which are just schedule 40 PVC pipe.
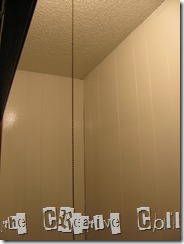
Then I cut and tacked in some trim along the bottom and up the corners to hide the gaps between the paneling.
In all, we spent less than $100 to redo this closet. I still have some MDF left also to use for another project!
This is what it looks like with our clothes in. I am going to add a shelf above the middle hanging area to store my purses and that will leave the top right cubby for something else. I am also going to add a shelf to the right had side, so I can have a couple more baskets to store hats in – one for me and one for my husband.
When I can spray paint outside – I will take my shoe cubby and baskets and paint them white also, but for now – this is a huge improvement over what it was!
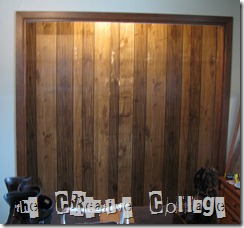
BEFORE: AFTER:
BEFORE:
AFTER:
It really isn’t fancy but for the small space, I feel like I am able to store much more and it is more accessible for me!
UPDATE: I added a couple more shelves and there’s a sneak peak of what I’ll be working on next in this room here.
Now that I finally have this project accomplished – I can finally work on painting the room, adding a curtain for the closet and sewing a bed skirt and bedspread.
the Creative Collage
I’m linking to the following…


Wow!! This looks awesome! Were the shelves hard to make? I’d love to see a tutorial on that.
I bet you are thrilled!!
Thanks for linking this to my Organizing Mission link party!
Wow!! I love this. I am sending a pic to the hubster. Mind if we steal the idea for the sewing room? I promise to put in a small framed piece noting that the design was totally stolen from The Creative Collage;-}
Feel free to use whatever ideas that work for your room. I have been really inspired by many others so I’m glad I can help someone else also!
amazing transformation! fantastic job…i want shelves in my closet, too! there is not enough drawer space in my dresser…or maybe i need to stop shopping, lol!
I LOVE this! Its FAB!!! Come on ‘ova and share this at my Linky Par-Tay!
*ENTER LINKY PAR-TAY Here! *
xoxokara
Nice job on your closet redo!
This is just amazing! I’m totally in the market for a closet redo also! Not only do we have paneling, we have this weird pressed cedar board that has to go.
And I love that you’ve made your own shelves, I am definitely going to look into that.
Thanks so much for the inspiration 🙂
I LOVE THIS!!!!! I have a few closets I need to do this too, but they currently have dressers in them. My favorite part was the “My husband helped me take them upstairs from the basement where I built and painted them.” I love the “I” did it. YOU GO GIRL!!! Thanks for sharing this on DIY Thrifty Thursday!
Wow! What a transformation! Totally custom looking and it inspires me to tackle some of my own closets. Thank you so much for linking up to the Inspiration Friday party this week! 🙂
Vanessa
Oh wow, that looks great! I would love to do something like that to our little closet but I am sure my husband would just pile stuff on those beautiful shelves! lol
I am visiting from Chic on a Shoestring, I would love if you could stop by http://www.mooseandtater.com
OH MY GOODNESSS!!!!! That looks amazing. I am so impressed. What an amazing transformation. Great project to share. So glad I stopped by.
A job well done! Looks really good and so functional too!
I wanted to let you know that I am featuring this post on my Organizing Mission link party tomorrow! Come by and pick up my “I am proud to be Featured On Organizing Mission Monday” button!
Pingback: Organizing Mission Monday Link Party - Week 13 | Organize With Sandy
You did an amazing job! It’s so functional now and the white looks so much better. Thanks for linking to We’re Organized Wednesday. I’ll be featuring this.
TY for blogging this, it was quite useful and told me a lot!